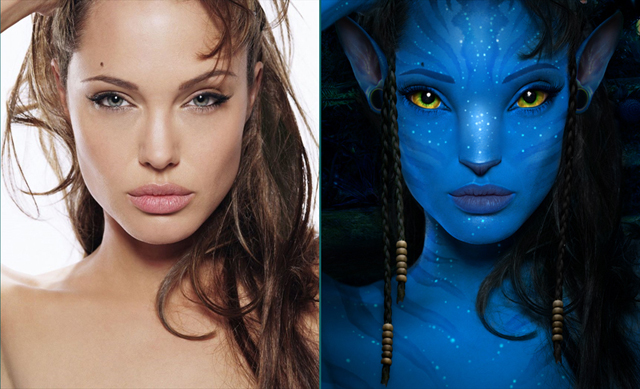
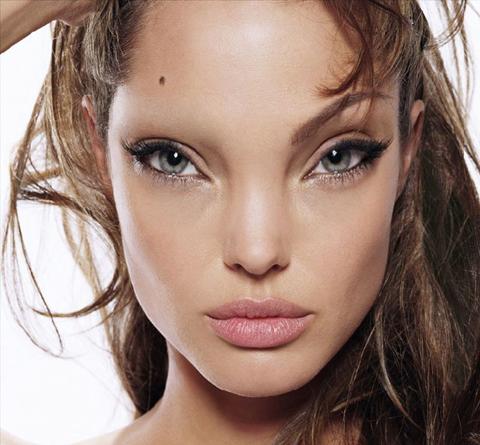
So by now you have seen a ton of people spit out photomanipulations of themselves as a Na'vi character. Some have been very well done... while others... could use a little guidance. Well it has been requested that I provide a thorough tutorial on how to turn someone into a more realistic looking Na'vi. Hopefully the information I provide will encourage some to go back and re-work their Na'vi'ed selves, or maybe inspire those of you who haven't made one yet... to hop on the bandwagon!
- The Best Photoshop Actions Ever
- Photoshop tutorials
- Freebies: Round-up of 100 Free Textures
- 100 Free Patterns to Boost Your Creativity
- Adobe Photoshop CS6 Classroom in a Book
- Adobe Master Class: Photoshop Inspiring artwork and tutorials by established and emerging artists
First make sure you have the tools you need!
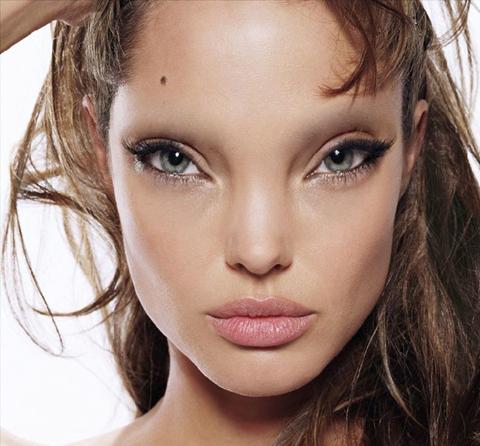
- A GOOD picture! One that clearly shows eyes and eyebrows. Hair pulled back is the best option for a picture because it allows you to manipulate braids and other hair textures into the image if you want.
- Photoshop (I used CS3, but as long as you have the Liquify Filterâ?¦ it's all good! To see if you have it, just go to the "Filter" drop down menu and "Liquify" should be there)
- Skin texture brush from here Skin texture (it's free!)
- WACOM Tablet (not required! But helps. Big time.)
Index
- Prep
- Eyes
- Eye Brows
- Skin Color
- Nose Shape
- Pupil Size
- Pupils Color
- Lips
- Nose Tip
- Face
- Eye Brows (Na'vi Style)
- Face Stripes
- Glow Dots
- Body
- Neck
- Background
- Ears
- Hair
Prep
Install the brush. If you need help doing so you can follow this tutorial: Install Fonts and BrushesOpen Photoshop. Go to Edit>Preferences>Performance. Where is says "History && Cache" Change the history states to "1000". Chances are you will mess up A LOT and you want to be able to go as far back as you need to. Press OK.
Go to File>Open and locate your file.
 If you are experienced with Photoshop, I recommend a very large image
with a resolution of 300 pixels per inch. This way you can go in and
add detail to make the final result look even more real! Also, the
process will go a lot smoother if you can see the texture of the skin in
the image. However, my image is large enough to see the skin texture
and it's at 72 pixels per inch. So either wayâ?¦ make what choice you
feel is best.
If you are experienced with Photoshop, I recommend a very large image
with a resolution of 300 pixels per inch. This way you can go in and
add detail to make the final result look even more real! Also, the
process will go a lot smoother if you can see the texture of the skin in
the image. However, my image is large enough to see the skin texture
and it's at 72 pixels per inch. So either wayâ?¦ make what choice you
feel is best.
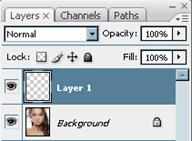
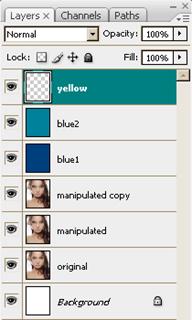
Create a New Layer
Click on the background layer. Use the selection tool
You should currently have two layers. A Background Layer, and the Original Layer on top of it.
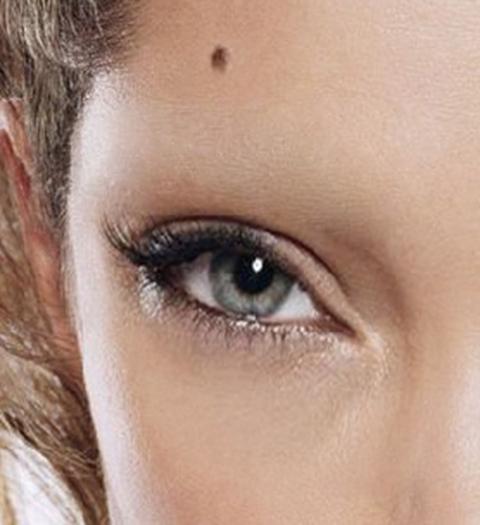
Eyes

Click Ctrl+C and then Ctrl+V (copy/paste) to paste the eye onto another layer.
After painstaking research, I have discovered the calculation for the eyes. I have tested this method using the actors from Avatar and their Na'vied selves and these steps seem correct.
Still on that eye layer, go to Edit>Free Transform or Ctrl+T to open the Free Transform tool.
Change the Width, Height, and Rotate numbers to that shown below. If you are working on the right eye (the one I'm working on) then you rotate the eye -10. If you're working on the left eye, it's +10.
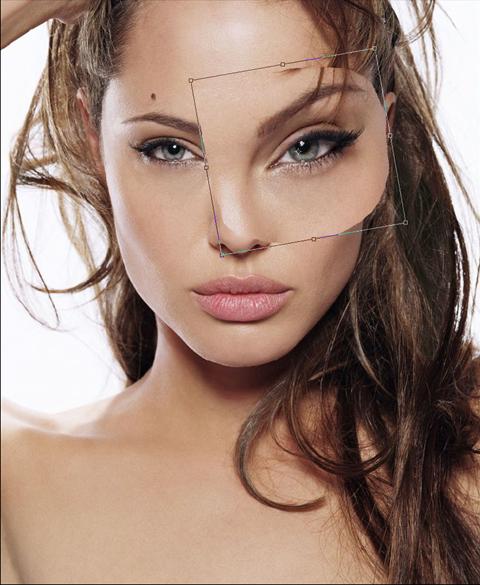
DO NOT QUIT THE FREE TRANSFORM YET!
Still in the Transform Toolâ?¦ go to the Reference Point Location and change it from this
Turn off the link between the width and height. Change the width to 115%.
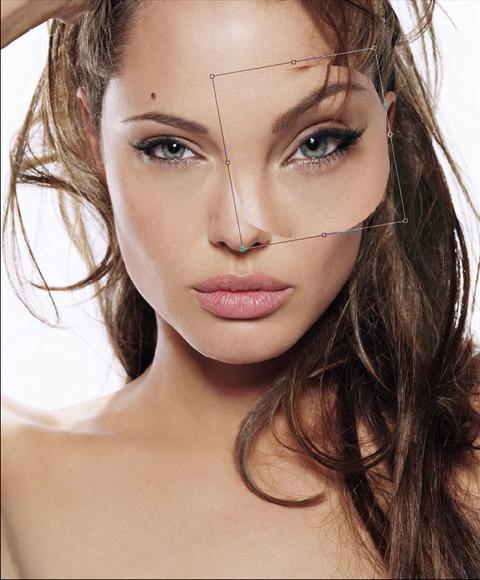
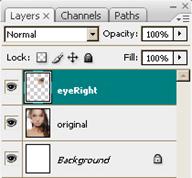
Exit Transform Tool. Repeat for the other side. Again, select the eye, copy and paste it onto a new layer.

Remember: Left eye is
Exit Free Transform Tool. Select an Eye Layer. Select Eraser Tool
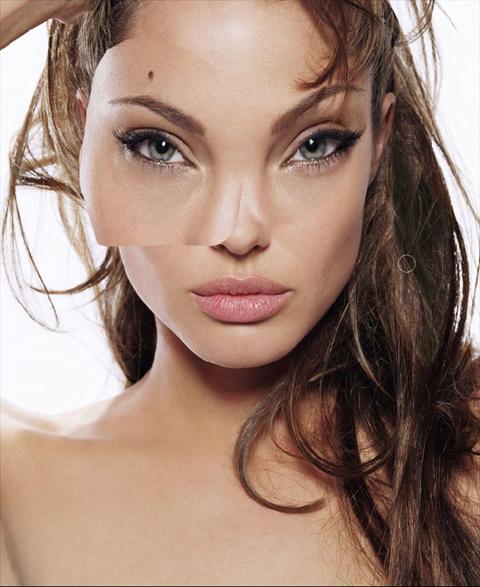
Repeat for other Eye.

Lower the opacity of the Eraser to 30% and carefully erase harsh edges and fix blending.
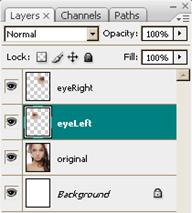
Select both eye layers by clicking one, holding Shift, and then clicking the other.
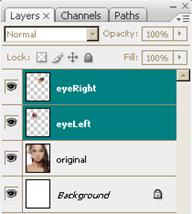
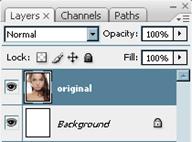
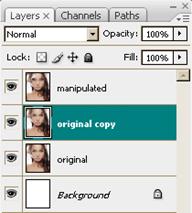
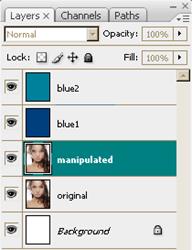
Layer>Merge Layers OR Ctrl+E. Select Original Layer, duplicate the layer by dragging it down to the "Create a New Layer" icon
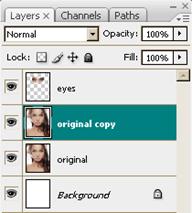
Select the Eyes Layer and the Original Copy and hit Ctrl+E. Duplicating and merging layers is necessary when working on something like this. If you mess up, you need a back up copy. I re-named the file as "manipulated".
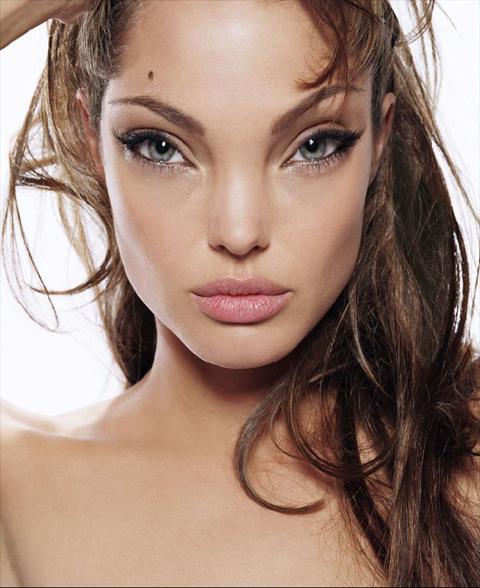
Now you have the original image and the "manipulated" one. We will continue to work with the Manipulated Layer.
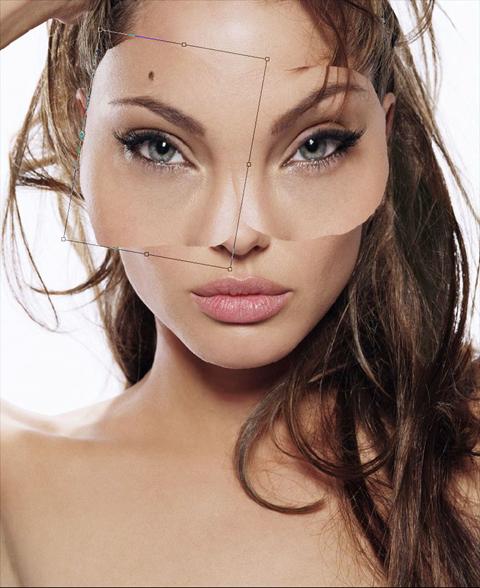
Eye Brows
Select the Patch tool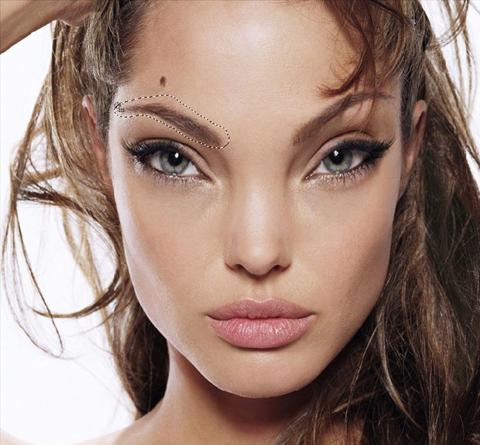
Drag the selection to a large open area of skin (such as the forehead or cheek).
Select Eraser tool

(See the empty white area in the first image?)
Now select the healing brush
Repeat with the other eye. Use the Patch tool

If You have Hair in the Way:
Skip the next step if your image does not have hair in the way. Just repeat the steps for the first eye brow.
My image has hair in the way - to even it out I used the Clone tool
Change the opacity to 10%, hold Alt, and click on a large area of plain skin (again I used the forehead). Use this tool on the eye brow a couple times to make it look like there is more skin.
Select the Spot Healing Brush

Back to Healing Brush
Erase the harsh lines with a Smooth Round Brush to smooth it out.
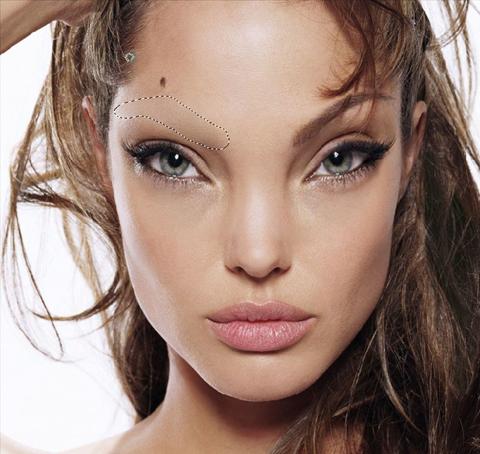
Duplicate the Original Layer
Hold Shift, and click on the Manipulated Layer.
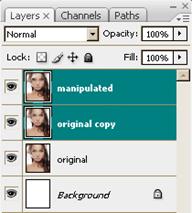
Ctrl+E to Merge Layers. Again you have the Manipulated and Original Layer.
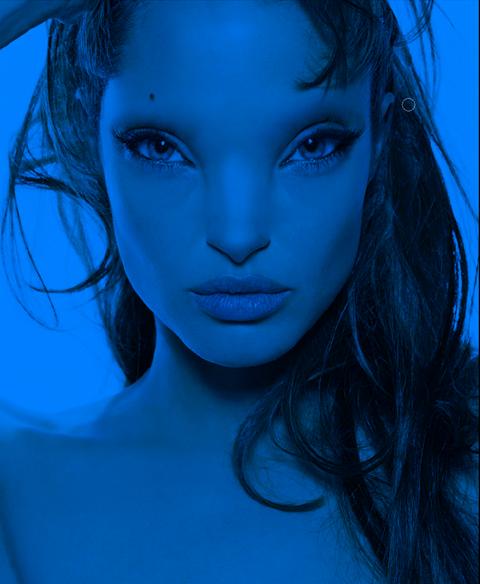
Skin Color
The Na'vi skin has blue-green skin with purple-blue undertones. I tried to create this look by making a couple layers of color. Create a new layer and fill it in blue. I'm using color #00407f. Change the Blending Mode to Hard Light.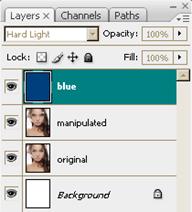
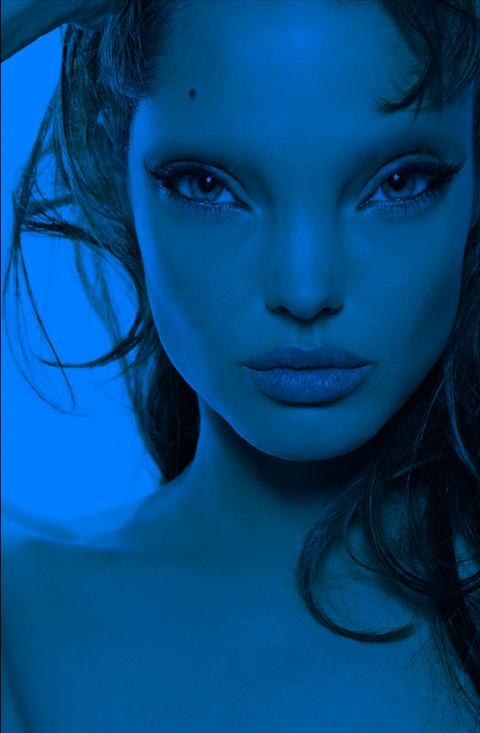
Create another Layer, color it Blue as well. I'm using #00819b. Change the Blending Mode to Overlay.

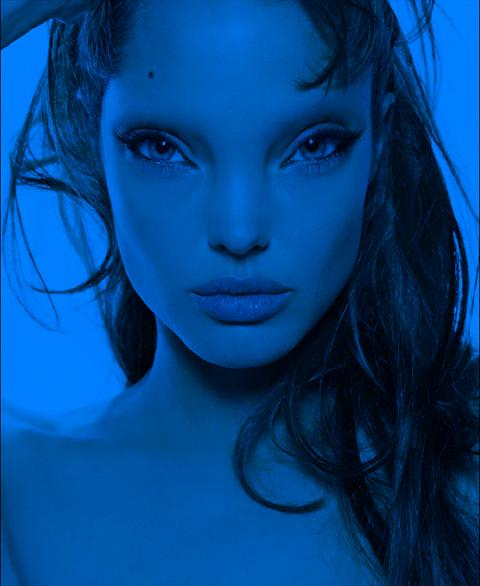
This will bring a light blue light to the face. Of course you can adjust the color layers if you do not like the effect. I usually use Hue/Saturation and play with it a bit.
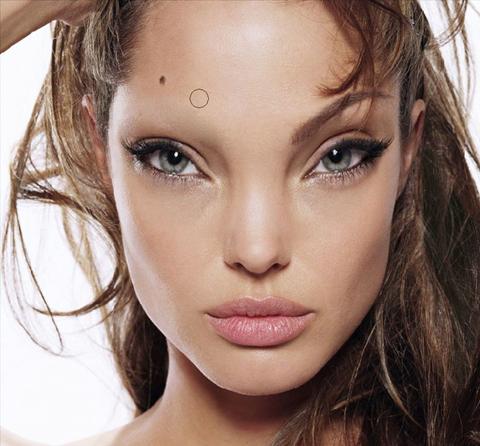
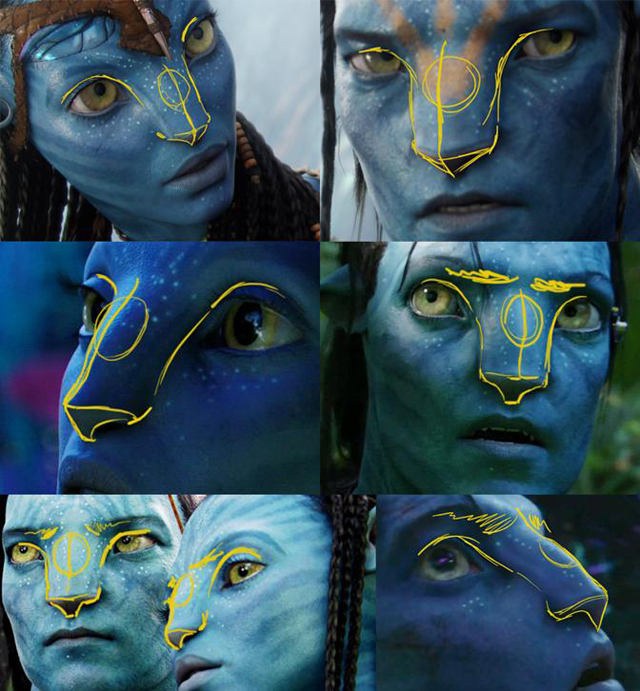
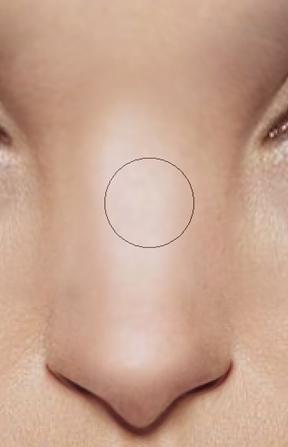
Nose Shape
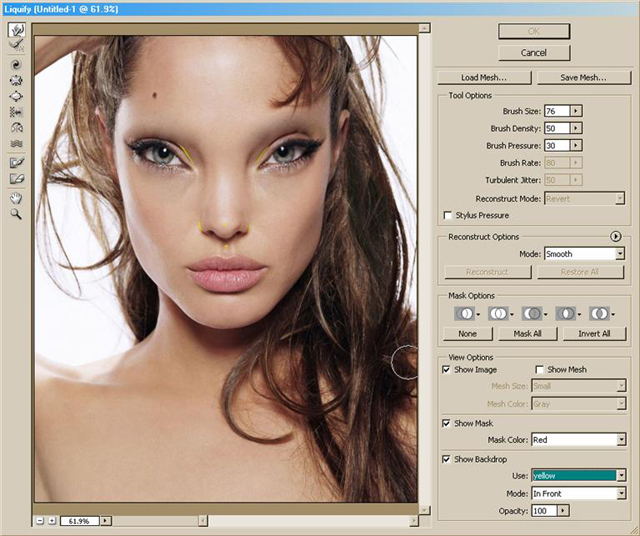
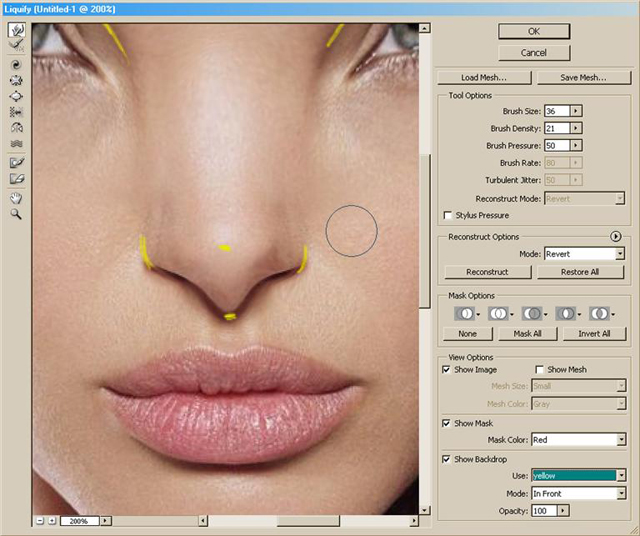
This is the hardest part because the Na'vi nose has a very unique look. Creating it depends on the angle of your picture.The nose curves at the top, creating a little bulge if you are looking at it from the front. I have outlined the curves of the nose and how the eye brow is a little deeper than most humans. The circle is where the bulge is. Also, notice how the curves of the nose meet up with the eye. The more you study this and take the anatomy into mind, the more Na'vi-like the face and nose will be!
Duplicate the Manipulated Layer. Create a new Layer and make sure it's placed at the top of all the layers.
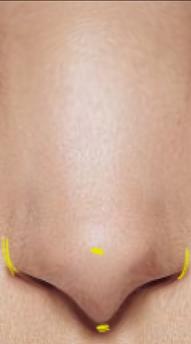
Select a color that is easy to see (I used Yellow) and mark the same parts of the nose and eyes as I did. The little dot under the nose is going to be where the new nose ends, eye ball this according to your references of the nose.

Click on the Manipulated Copy, go to Filer>Liquify. In the Liquify menu, locate and click on "Show Backdrop". And Change the setting to the following.
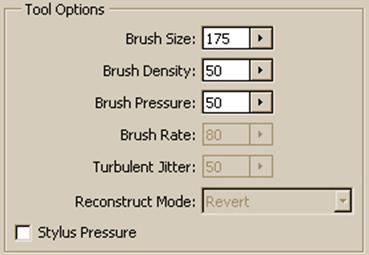
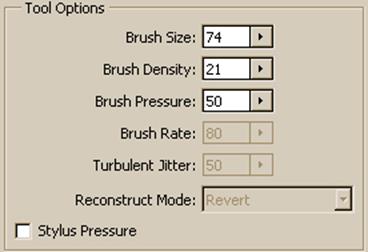
Now Change the brush settings to the following
And carefully take the dark shadows of bridge of the eyes, and move them to meet up with the Yellow marks:
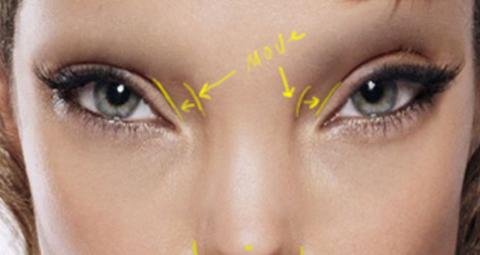

Do not worry about the squished eyes.
Make the brush a bit smaller. Take the light from the center of the nose and moved it up to create a "bump". This should also deepen the brow just a little bit.

Zoom into the bottom of the nose. Change the settings as shown below:
Stretch the bottom of the nose down to the yellow dot.

Make the brush a bit smaller and stretch the nose to look more cat-like, like so:
Adjust the light from the tip of the nose so that it is down and spread out a little bit more. Move the point of the nose lower.
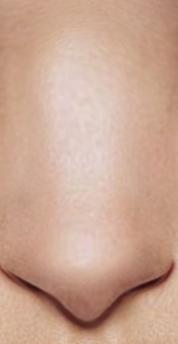
Click Ok. Erase the squished eyes delicately so that the eyes from the Manipulated Layer below come through. Be careful not to erase the crease we just made from the Liquify. I find turning off the blue helps.

Zoom into the nose and you will notice a little weirdness with the skin pores being stretched out.

Select the Blur tool
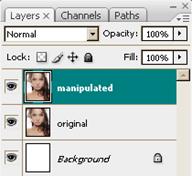
Delete Yellow Layer. Select Manipulated and Manipulated Copy and Ctrl+E. Changed Layer name.
Next page >>
Read more: http://www.webdesign.org/photoshop/photo-editing/angelina-jolie-as-a-na-vi-from-avatar-movie.18062.html#ixzz36QQRm7bc
No comments:
Post a Comment